Sepia
Photography Portfolio WordPress Theme
- created: 03/06/2018
- latest update: 03/06/2018
- by: Jan Skwara (johnnychaos)
- themeforest.net/user/johnnychaos
- email: themeforest@germino.pl
Thank you for purchasing my Theme. If you have any questions that are beyond the scope of this help file, please feel free to submit a Support Ticket here.
You can also view my ThemeForest profile here.
Overview

Sepia – is a complete WordPress theme based on popular Bootstrap Framework. It fits perfectly for photographers, photo studios and design agencies. It looks great with all types of devices (laptops, tablets and mobiles). Create your own unique and beautiful photography website in minutes!
Features:
- Elementor Drag and Drop Page Builder Included
- One Click Demo Import
- Multilingual (WPML supported)
- Built with HTML5 and CSS3
- Based on Bootstrap Framework
- Fully Responsive
- Light & Dark Version
- Easy Customization
- Well Organized and Commented Code
- Clean and Neat Design
- 3 Contact Page Designs and Contact Form 7 support
- Google Maps
- Google Fonts
- Font Awesome Icons
- Content Carousel
- Video Compatibility
- Lightgallery
- Infinite Home Styles
- 18 Album Page Styles
- 18 Album Item Styles
- 3 Album Gutter Styles
- 16 Gallery Styles
- 3 Gallery Item Styles
- 3 Gallery Gutters Styles
- 2 Menu Styles
- 6 Footer Styles
- 5 Blog List Layouts
- 3 Blog Single Post Layouts
- 3 Blog Archive Layouts
- Compatible With All Major Latest Browsers
- And much much more...
Installation
To run this theme you must have a WordPress platform already installed on your server. You can download latest version of WordPress on it's official website. For information in regard to installing the WordPress platform, please read the WordPress Codex - http://codex.wordpress.org/Installing_WordPress.
If you're looking for good WordPress hosting, I can recommend you SiteGround. I use their servers to host demos of my themes and I'm satisfied with the quality, performance and quick support. Even the StartUp plan is very fast. They can migrate your website for free and you have money back guarantee.
Installing theme
Extract the zipped package downloaded from ThemeForest (All files & documentation), in the extracted folder you will find sepia.zip file which is the WordPress theme. You can also download only theme files (Installable WordPress file only):

You can install the theme using WP admin panel or FTP software
Installing using WP admin panel
In WP Dashboard navigate to "Appearance -> Install Themes -> Upload" page. Select "sepia.zip" file. Press the "Install Now" button to upload and install the theme. Bellow are step by step screenshots:


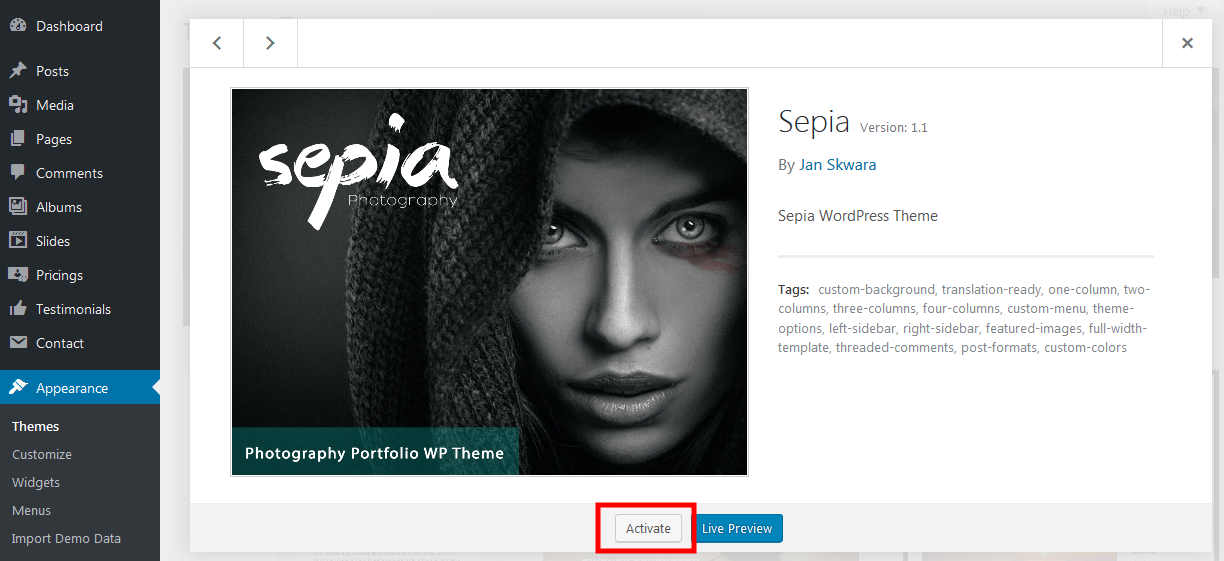
After uploading the theme, you have to activate it. Navigate to Appearance -> Themes page to activate the theme.
2.3 Installing using FTP software (alternative)
Unzip sepia.zip file. Upload theme folder (sepia) to /wp-content/themes/ folder on your server.
You can use your web hosting file manager or some FTP software like FileZilla.
After uploading the theme, you have to activate it. Navigate to Appearance -> Themes page to activate the theme.
2.4 Required and recommended plugins
Theme comes with a few plugins to extend its functionality:
- Sepia Utils (required) - adds main theme functionality, post types and shortcodes.
- Redux Framework (required) - provides framework for Theme Options
- Meta Box (required) - provides framework for Page Options
- Categories Images (required) - gives you an ability to add images to post categories
- Contact Form 7(required) - allows you to add contact form
- Elementor Page Builder (highly recommended) - add ability to design pages with Drag and Drop
- Meta Box Conditional Logic (recommended) - provides additional features for Meta Box plugin
- Meta Box Show Hide (recommended) - provides additional features for Meta Box plugin
- One Click Demo Import (recommended) - allows you to upload demo content with one click
- Instagram Widget by WPZOOM (recommended) - allows you to display photos from Instagram feed in the sidebar or the footer.
After activating the Sepia theme you will see info box about installing those plugins. Click "Begin Installing plugins".
Next activate plugins:

Demo Content
Theme comes with the demo content, to help you painless start customizing the page. You can use One Click Demo Importer plugin attached to the theme. It will import all data including posts & pages, widgets, menus and theme option.
First install the theme and activate all required plugins. Make sure that One Click Demo Importer is also active.
Then set up the permalinks:

Go to Appearance -> Import Demo Data and choose "Import Demo Data":

Click on the import button and wait. Importing can take few minutes so don't navigate away from the import page until you receive success confirmation.
Theme Update
To update the theme install Envato Toolkit Plugin. Here is a tutorial how to use this plugin to update your theme: https://premium.wpmudev.org/blog/how-to-update-themeforest-themes-with-the-envato-wordpress-toolkit/.
You can also use FTP method and replace files located in the "wp-content/themes/sepia" folder.
Home & Blog Setup
By default the homepage will show up your latest blog posts. If you want to show up a custom homepage (like in demo), you must create two new pages (Pages -> Add New) - one for homepage, second for blog page. For example you can create one page called „Homepage” and one called „Blog” (Note: you can choose other names, it's just an example). Pages can be empty for now.
Then go to "Settings -> Reading", check A static page and choose correct pages in select boxes as in screenshot:

Theme Options
Theme has many "Theme options" that allows you to customize the page. Many of the options are required, so make sure you check all of them. You can access options from dashboard or from live customizer. Most of page, post or albums options you can override in specific page settings, so treat Theme Options as a default settings and adjust them in single page options if needed.
Dashboard:

Customizer:

Most of the options are obvious but below I will explain a few:
Footer type:

You can choose one of the 6 types of footer. You can add widgtes only to the Default Footer. They are divided in the three columns:

Skin switcher:
You can add a skin switcher to the page. It will allow visitors to change the skin between dark and light sheme. Please remember to add light and dark logo versions in Theme Options

Load with Ajax:
You can choose the pagination type:
Regular

or Ajax

Menus
Sepia supports main menu located in the header and the footer menu as well as menus in sidebar and footer.
Header Menu
To add main menu go to "Appearance -> Menus" and create the menu (here is a tutorial). Don't forget to check "Theme locations -> Header Menu":

You can choose one of two header menu layout. Go to "Sepia Options -> Appearance" and choose "Header Background" option:

Solid color background looks like this:

Transparent background menu looks like this:

Footer Menu
You can add a menu to the Footer. Create a men the same way like for the header, and choose "Footer Menu" location.
Widget Menu
You can add menu to footer or sidebar by using "Custom Menu" widget. First create the menu and don't specify "Theme locations".
Next go to "Appearance -> Widgets" and add "Custom Menu" widget to chosen widget area. In widget options choose the menu you want to display:

Albums
Sepia comes with the Albums Custom Post Type. Albums allow you to create galleries.
First you have to create a page that will display your Albums. Navigate to "WP Dashboard -> Pages -> Add new" and create a page with "Albums" template.

Next go to "Theme Options -> Albums" and choose this page in the "Choose Albums Archive Page" field:

Single Albums is a gallery that contains photos and provides additional information. You can for example add author, model, locations data.
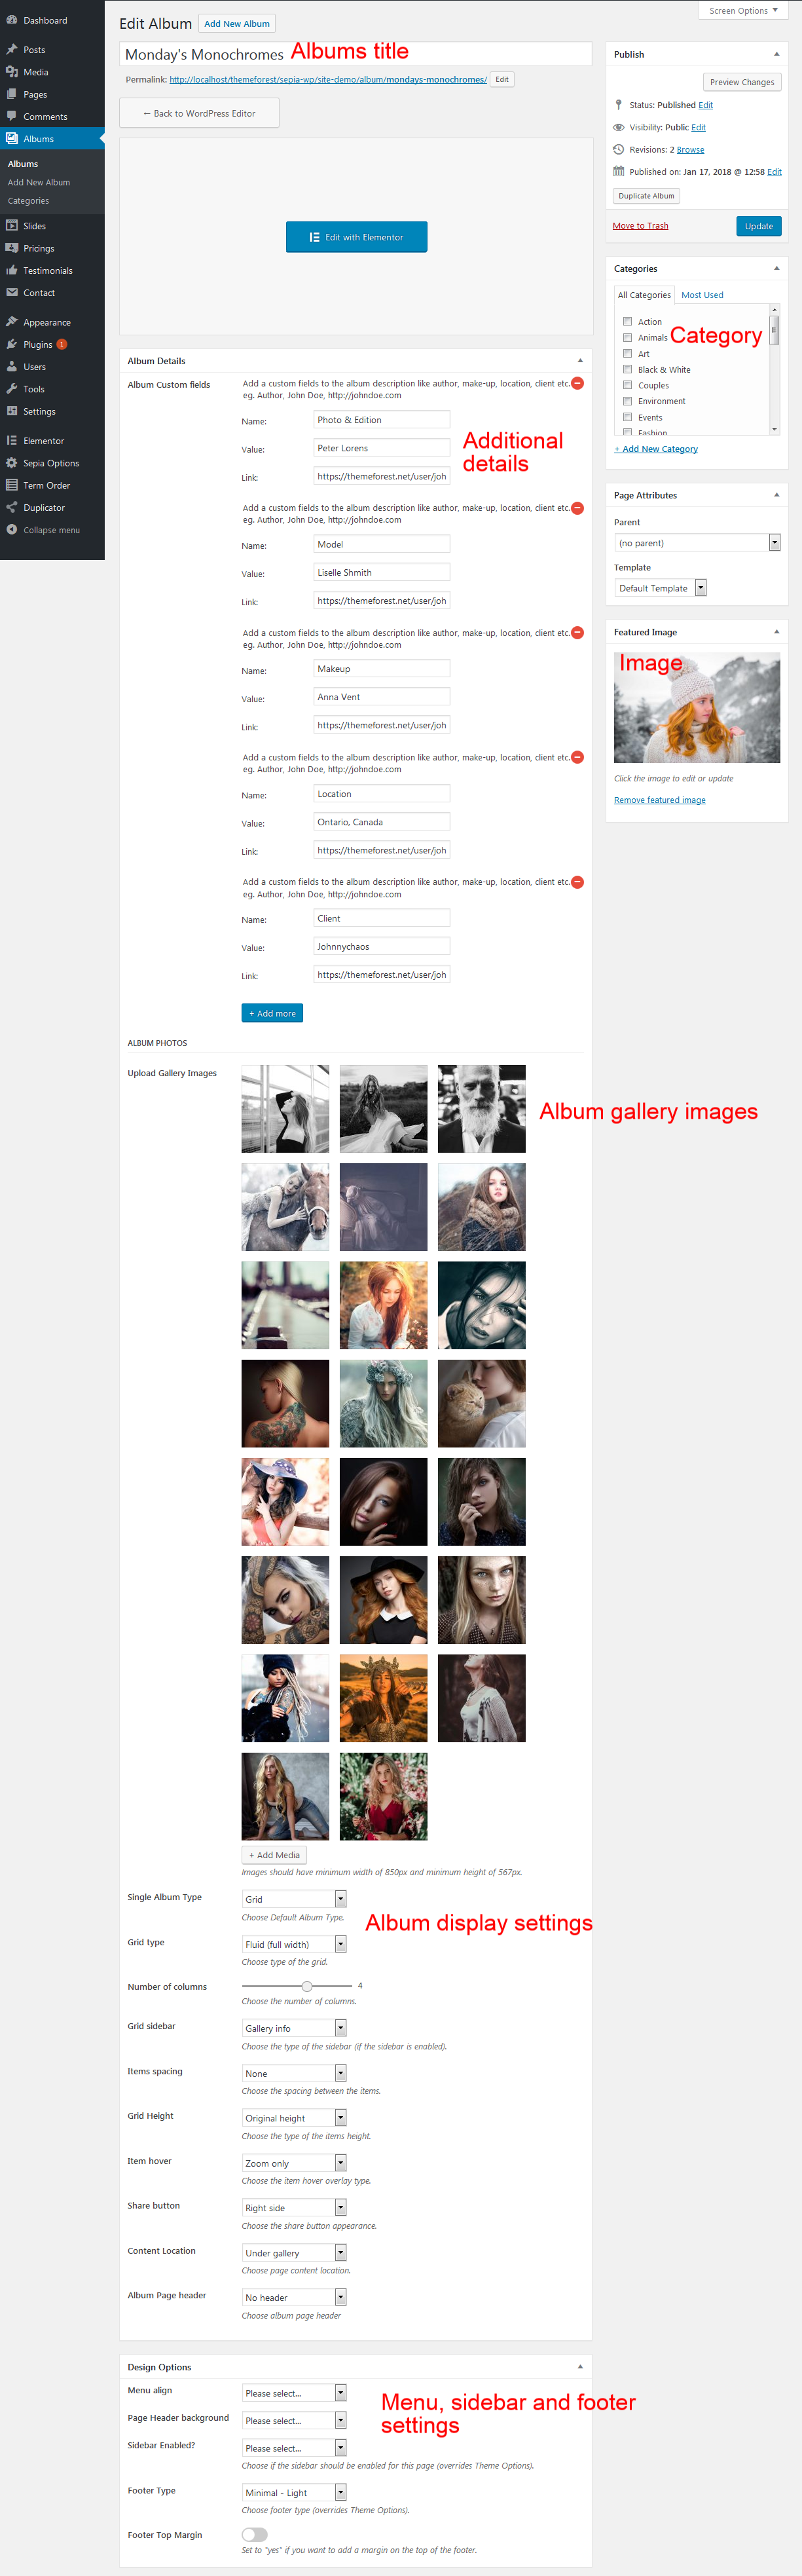
You can group Albums into categories. Every category can have a thumbnail image.

This will allow you to create filterable Albums grids:

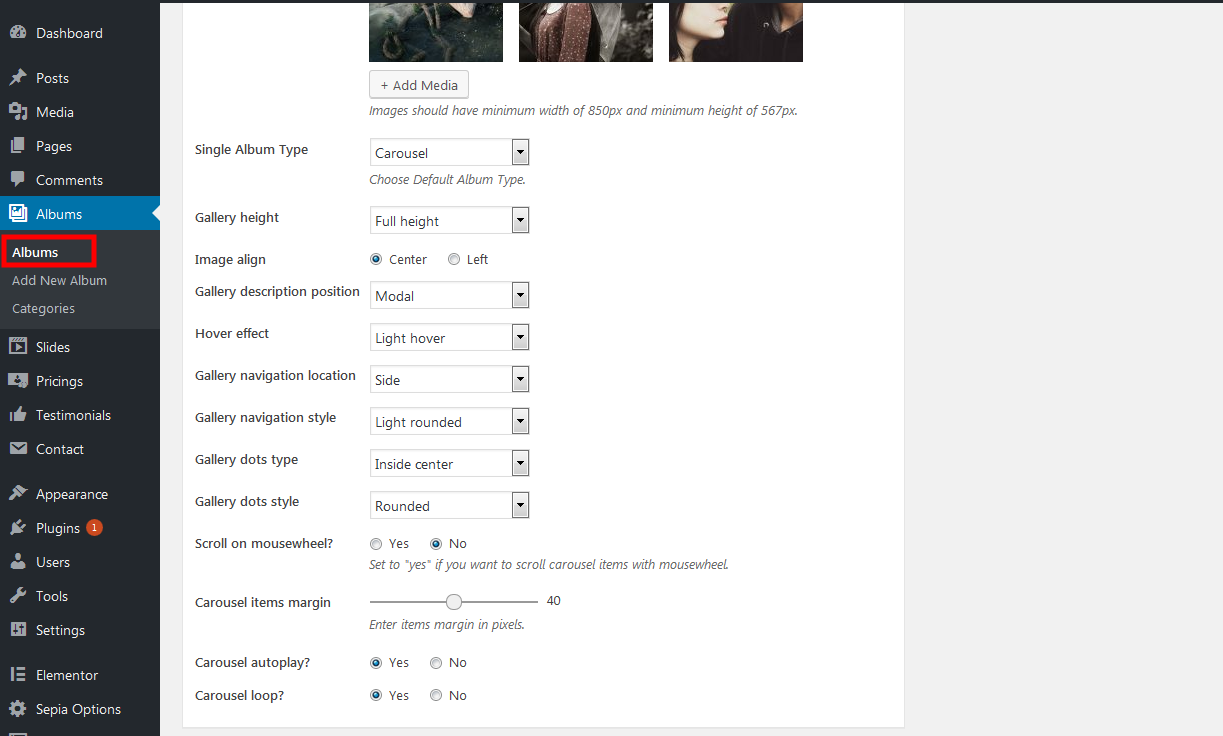
Sepia allows you to display Albums Archive and Single Albums in many ways. You can use grid or carousel layouts, specify margins, sizes, title appearance and much more. Please refer to the demo page to see what is possible.
You can specify default Albums settings in "Theme Options -> Albums" but all of them can be overwritten for specific Album in it's "Page Settings".
Theme Options -> Albums:

Page Settings:
Testimonials
Sepia comes with "Testimonials" customs post type.
Creating Testimonial
To add testimonial via WP Dashboard navigate to "Testimonials -> Add New Testimonial" and fill all required fields

Displaying Testimonials
You can display testimonials using Elementor Page Builder. You can find more info about this Drag and Drop plugin in the "Elementor Page Builder" section.
You can set many options while adding this Elementor Widget:

And don't forget to check some advanced settings that allows you to specify margins, padding or background:

Pricing
Sepia comes with "Pricing" customs post type. With "Pricing" you can create nice tables that gives brief information about your offer.
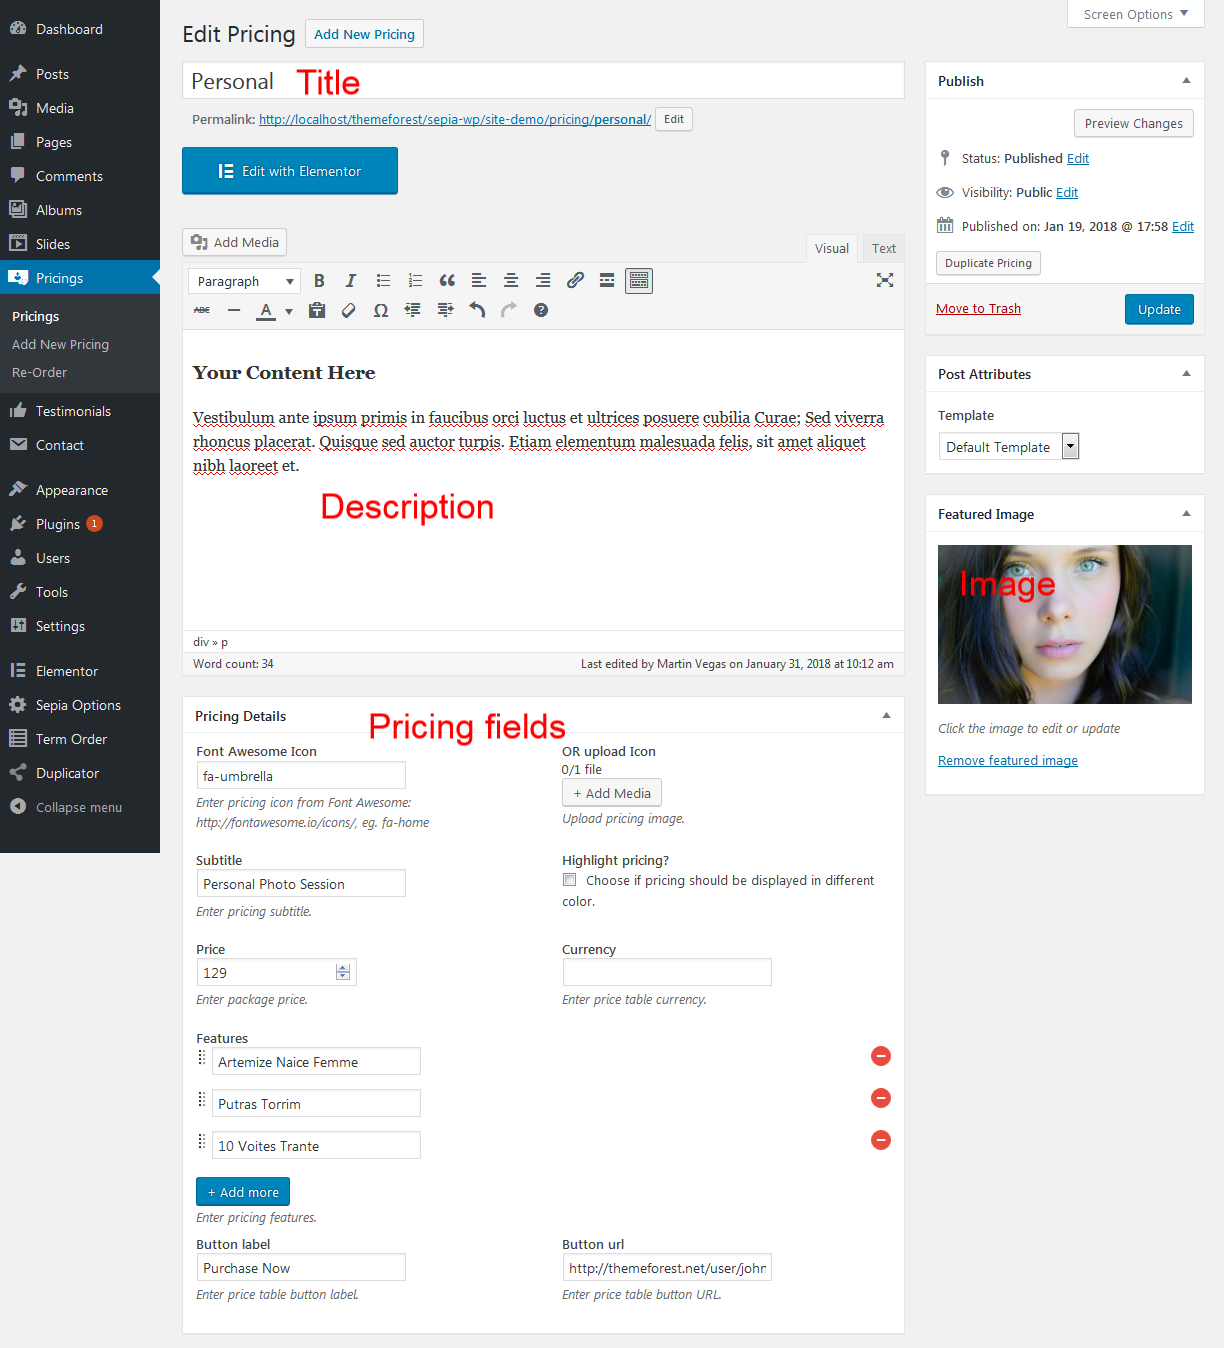
To create a pricing navigate to "WP Dashboard -> Pricings -> Add New Pricing". You can specify default Albums settings in "Theme Options -> Pricing" but all of them can be overwritten for specific Pricing Table in it's "Page Options".
To create Pricing Archive Page (page that will display all pricing tables) navigate to "WP Dashboard -> Pages -> Add new" and create a page with "Pricing" template.

You can also display Pricings with the Elementor Widget:

Slides
You can create a header slideshow using "Slides" Custom Post Types.
Every slide has additional fields: Subtitle and links. Don't forget to add "Featured Image" as this will be our slide background.

You need to organize Slides into Slideshows. When you want to display a Slides Carousel, you select a slideshow category and Slides Carousel will be created from all slides that are added to this slideshow.

You can add a Slideshow to header both in "Theme Options" for default settings or in "Page Options" for specific page.
Here is how it looks in "Theme Options":

And in "Page Options":

Elementor Page Builder
Theme uses WordPress Page Builder plugin to add an ability to design pages with drag and drop interface.
Please refer to the official plugin documentation to find how to use it: https://docs.elementor.com/article/226-getting-started
I extended the plugin with custom widgets that allow to add theme specific elements:
- albums
- categories
- posts
- testimonials
- pricing
- about me
- galleries
- slideshows
- etc

All widgets come with additional parameters to control the data and the appearance.
And don't forget to check some advanced settings that allows you to specify margins, padding or background:
Theme Translation
Sepia is "translation ready". it means that you can translate it to any language by editing language files.
language files are located:
- for Sepia theme in sepia/languages folder
- for Sepia Utils plugin in sepia-utils/languages folder
Read more about translating theme: here.
Multilingual Page with WPML
Here is what you need to know on turning Sepia multilingual with WPML.
First, you need to to purchase a recent version of WPML, including the WPML String Translation and WPML Media modules.
Initial Setup
– Install and activate the core WPML plugins (WPML Multilingual CMS, WPML String Translation, WPML Media), and then other WPML plugins that may depend on them.
– Set up WPML from "WPML->Languages". See WPML Getting Started Guide for complete reference, but the initial simple three-step setup is self-explanatory, asking you to choose your default language, a set of active languages, and a language selector.
Translating Pages, Posts and other post types
To translate a page you need to go to "WP Dasboard – Pages" and in the list you will see columns for each active language, with a pencil icon (for ‘edit translation’) or a ‘+’ icon (for ‘add translation’) next to each page. Do the same for Posts and Custom Post Types (Properties, Agents, etc.).
Right now you just need to translate your page into the new language.

Read this to easily duplicate your existing content.
Translating custom taxonomies
Go to "WPML -> Taxonomy Translation". You can find all taxonomies there. You can add a translation to each value clicking on the pencil icon (for ‘edit translation’) or a ‘+’ icon (for ‘add translation’).
26.4 Translating Menus and Language Switcher in Header
WPML can synchronize menus for you. This means that if some entries, for example some pages, posts or categories, are in the English menu, WPML can generate and keep in synch menus for other languages pointing to the translated versions of these pages, posts or categories.
From WordPress "Appearance->Menus" you can see your existing menus and add menu translations and synchronize menus across translations.
Translating Sepia Options
When adding or editing "Sepia Options" make sure, that you chose "All languages" from the top menu language switcher. All inserted data will be default for all languages:

Go to "WPML -> String Translation" and from the dropdown on the top of the page (Select strings within domain) choose "admin_texts_sepia_options"
Translate all strings you find there. Make sure, you check "Translation is complete" checkbox. Every time you change Sepia Options, go back here and check if translation is correct.

Resources
Here are links to the resources I've used:
Fonts:
- Google Fonts – http://www.google.com/webfonts
- Font Icons – http://fontawesome.io
Scripts:
- jQuery – http://www.jquery.com
- Bootstrap framework – http://getbootstrap.com
- Animsition – http://git.blivesta.com/animsition/
- jQuery Mouse Wheel – https://github.com/jquery/jquery-mousewheel
- Owl Carousel – http://owlgraphic.com/owlcarousel
- YTPlayer – https://github.com/pupunzi/jquery.mb.YTPlayer
- Animate.css – http://daneden.me/animate
- Isotope – http://isotope.metafizzy.co
- Imagesloaded – http://imagesloaded.desandro.com/
- Lightgallery – http://sachinchoolur.github.io/lightGallery/
- Jquery Easing – http://gsgd.co.uk/sandbox/jquery/easing/
- Google Maps – https://developers.google.com/maps/documentation/javascript/tutorial
- uniMail – https://github.com/agragregra/uniMail
Images in demo site:
- https://unsplash.com/
- https://www.goodfon.com/
Once again thank you for purchasing my Theme. Enjoy!
If you have any questions that are beyond the scope of this help file, please feel free to submit a Support Ticket here.
You can also take a look at my other themes and templates.
Follow me on Themeforest to be notified about my new products.